On The Fly Image Transformation Quick Start
Quick Start
Getting set up with SlashedCloud is easy - just tell us where your assets live, set some basic defaults, and you can start serving assets through our Rendering API in minutes.
The quick-start instructions are below, and if you have a more complex integration, you can head directly to Source setup for the advanced details like cache TTL, default parameters, and custom domains. For recommendations about setting up your assets before integrating with SlashedCloud, see the Setting Up Asset Storage guide.
10 Minutes to Serving with SlashedCloud
Once you've signed up or signed in to your SlashedCloud account, you'll be at the dashboard, which is an overview of all your projects, services and stats for your account.
Already created a project? Jump to step 3.
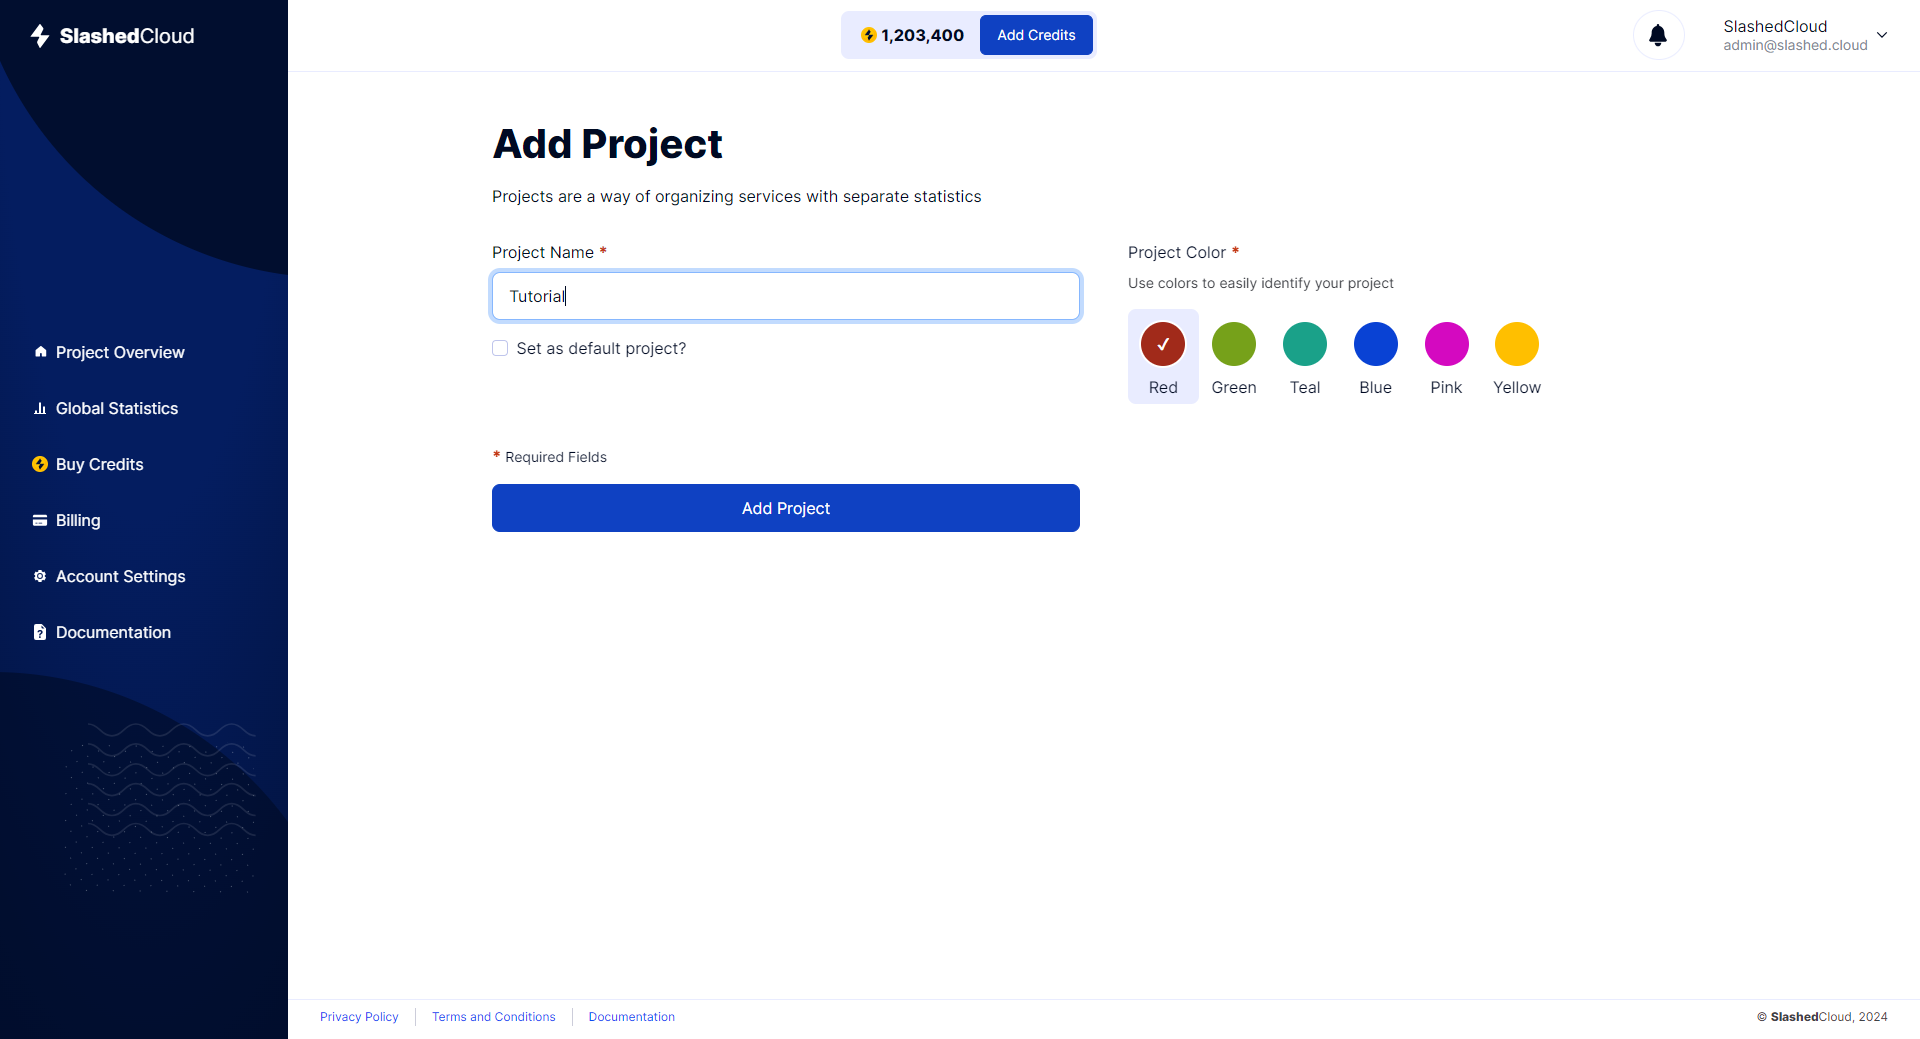
- From the dashboard, click on Add Project.
- The project name and color is only used to easily identify your project.
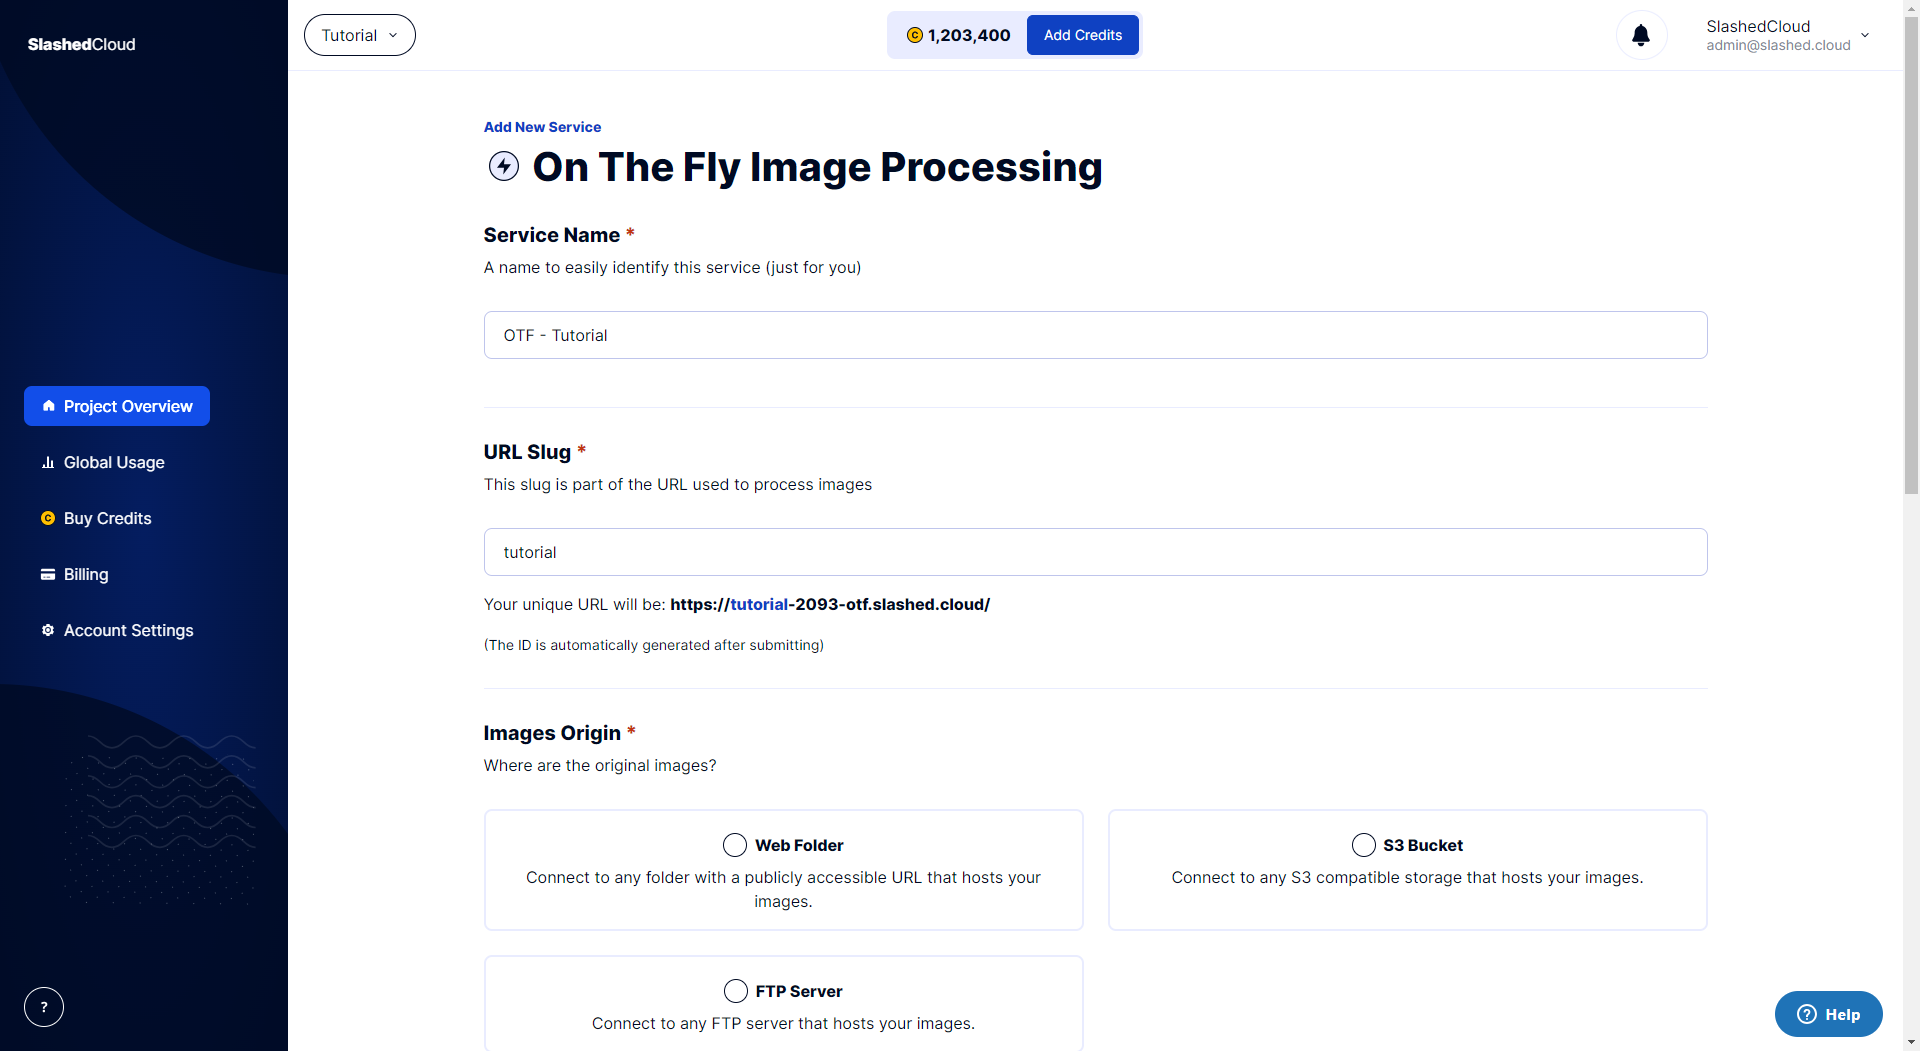
- Now you've created your project, you can add a service. Click on Add Service.
- Similar to the Project Name, the Service Name can whatever you'd like it to be.
- The URL Slug is set as your Service Name + Service ID by default but can be changes at your discretion. Note: If you're creating a new service, your Service ID will be generating after submitting.
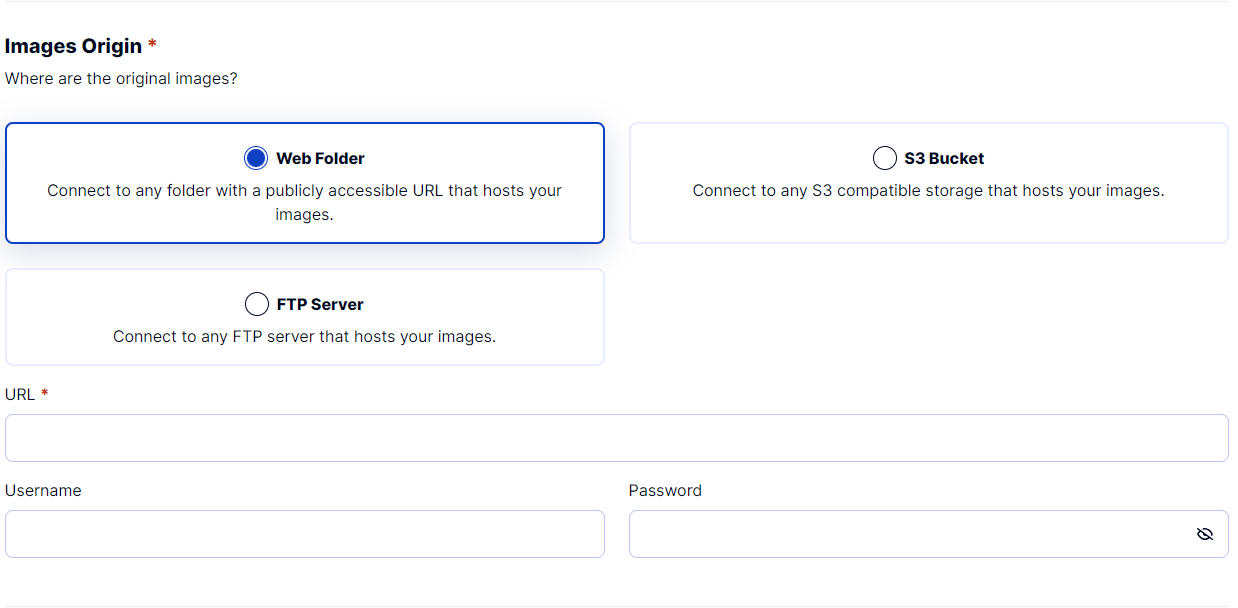
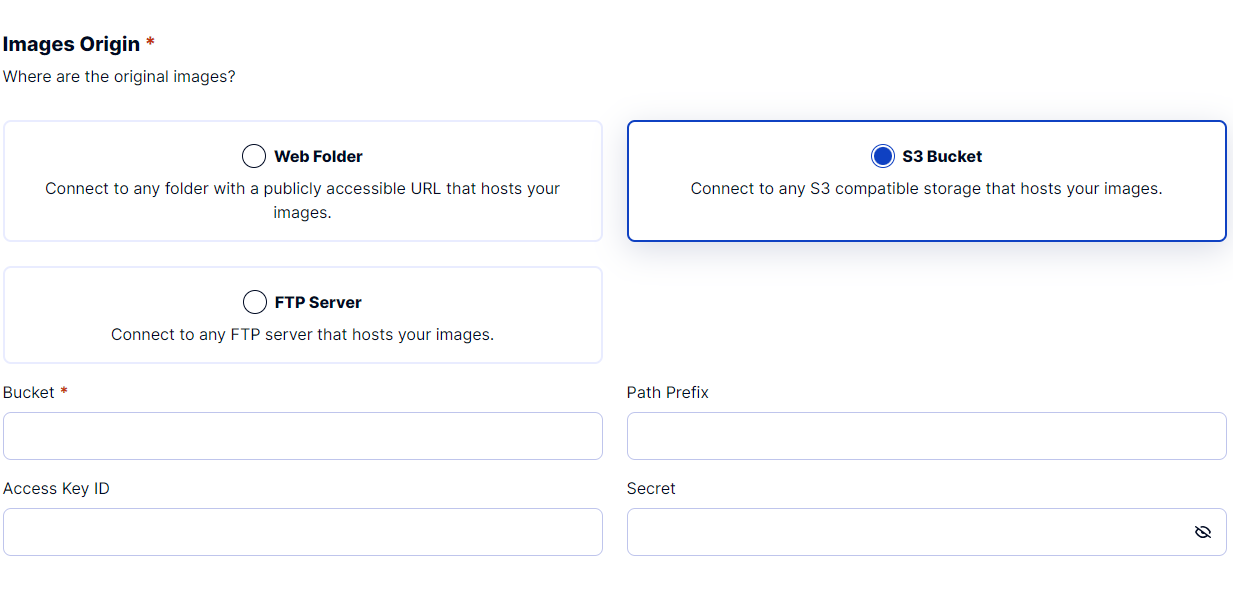
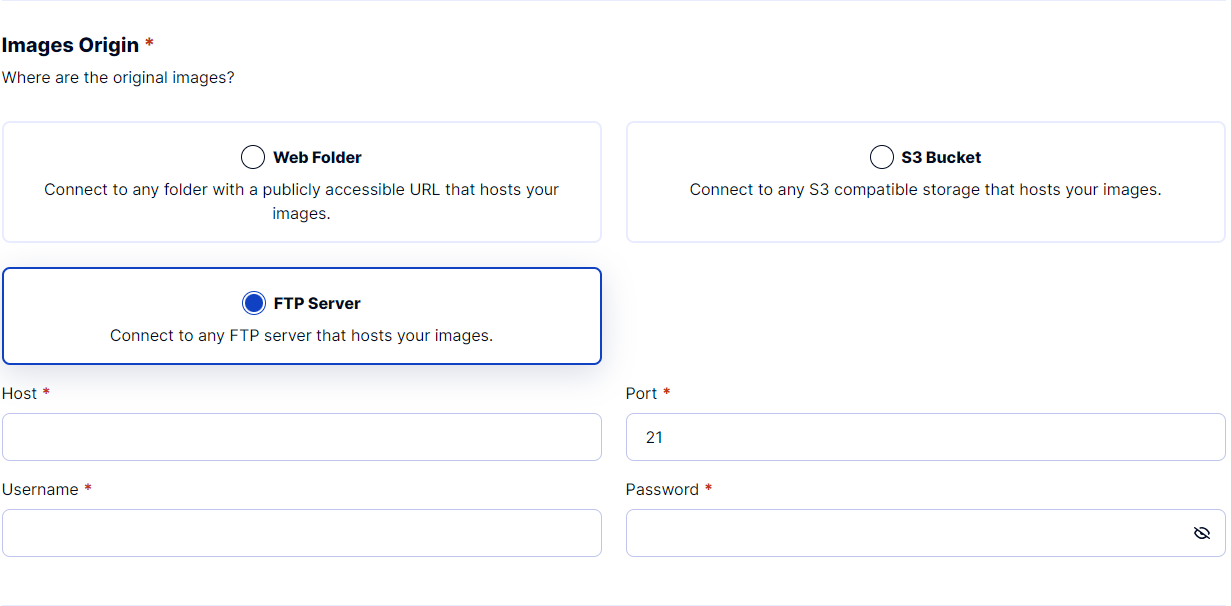
- The next step will be defining the origin of your images.
- Web Folder
- S3 Bucket
- FTP Server
- URL Parameter Processor
Note: We suggest that you use the SlashedCloud URL Parameter Processor.
- SlashedCloud Engine
Documentation - Image Engine
- Imgix
- Photon
- SlashedCloud Engine
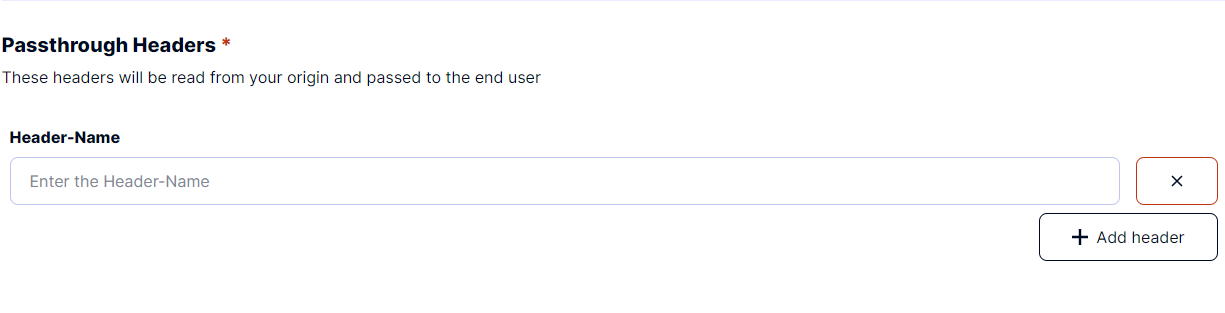
- Passthrough Headers
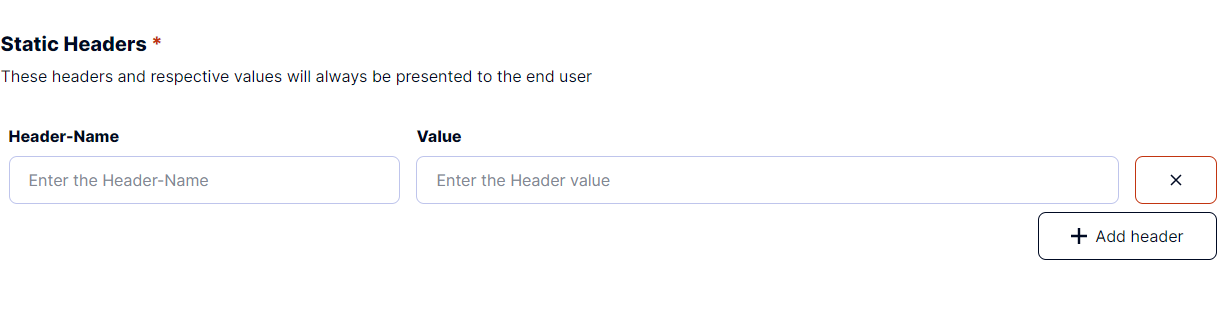
- Static Headers
These headers will be read from your origin and passed to the end user.
These headers and respective values will always be presented to the end user